Sunday, March 21, 2010

Playing with Dominoes

This is a copy of the challenge I am hosting on the K2K Kreative Krew Blog this week.

I'm Brook and I am your host for Challenge Number Four.
I know you have seen those cute domino pendants at the craft show and on ebay or etsy. They are so easy for the digital scrapper to make. I want to challenge you this week to try making your own.


There are several ways to do this. I'm going to share with you the easiest way possible.


You need: A domino, a bead, maybe adhesive, mod-podge or spray sealer, and jewelry or plastic glue.


1. Dominoes are 1 x 2". So make a mini layout that is .75 x 1.75". I just print them on normal paper so they lay flatter on my domino. Then cut out.


2. I just use any kind of scrapbooking adhesive on the mini picture and stick to the domino. (You can use the mod-podge to adhere the picture but let it dry before the next step.)


3. Then seal with the spray or mod-podge.


4. Next I place the clear bead on the top with jewelry or plastic glue. I like Beacon 375 but any will do.


If you've seen some other tutorials, they talk about letting the dominoes soak in bleach or using alcohol to take off the finish of the domino. I don't think it is necessary for this project. If you like doing this and want to stamp or use alcohol inks then you will need to remove the coating.


You can also make your domino a little dressier by using a silver bail that you find at the craft store. The dominoes can be horizontal or vertical.


I made 30 of these for a friends party and they were so easy to make. Here is one that I made for me. This took me less than 30 minutes to make.

I used Kris' "Circus in a Box" kit. If you win this challenge, your prize will be "Circus in a Box" so you can use this kit to make some fun pendants of your own. Anyone who participates will get a mini kit containing the eight items that I included on my pendant. If you use one of Kari or Kris' kits, you will get a little extra reward! ;)

Post the links to your pendants here. You have until Friday 26th at 12:00 pm CST. Have fun!

I hope that everyone will try this out and have a bit of fun!

Monday, January 18, 2010

Out of the Mouths of Babes


Okay. Here is last weeks POD. I decided that I was going to start taking pictures with my iphone because it is so easy and I usually have it out. I don't have to reach for a separate camera. I'm trying to make this as simple as possible.

Well, leave it up to Sam to find the errors in the week before. He told me that the pictures were on the wrong day and that there were other things that were more important. So here are the remade pictures.


So, so far it looks like I am keeping up with all of this. It doesn't seem like it should be hard, because I carry a camera in my purse all the time. I'm always snapping pictures of this and that.


Monday, January 11, 2010

Project 365


I'm going to try this again this year. I combined a little because I wanted to start this week as my week two. I like my weeks to start on Monday. I'm going to go back and put some numbers down on the second page and fix a few snaphooos, but I wanted to upload because I was going to try to be a better blogger.

Sunday, January 10, 2010

More Picts of the Room

I'm sure many of you are getting a little tired of hearing about my new classroom. I can't help it! I am so excited about my room. I still have tons to share. This is my outside bulletin board as you are walking down the hall. You can't help but see it.


A few little recycled beauties from my old school.
I did update the number on my door plaque.
I added this little bit of fluff over my door. I just didn't want anyone to not know which door was mine. This is a really cool thing. Built into our teacher cabinet, we have two places like this to put bulletin board supplies or charts. I am using them for bigbooks. I also have a few little Maya Road goodies that I have made into hall passes.
As you can see, I have covered tons of chipboard and wood. The other day at the Crafty Scrapper, some ladies were wanting to know the best way to cover chipboard. Well, everyone has their favorite, but I can do this in no time flat. This is how I do it.
You have to have a glass mat and here is the key- the fiscars finger cutter. I only like the orange one. The new retractable one does not give me the pressure I need at all. You can cover the chipboard with modpodge or outline them with your favorite adhesive. Place your piece or pieces of paper on the chip board. Then turn the letter over so the paper is on the glass mat. Take your fiscars and trace around the letter. Easy peasy lemon squeezy. No problem at all. I then take my Basic Grey files and file them. Then I ink. I have been using Ranger Vintage Photo, but this last group was done with Brown Courderoy. I really liked the effect. If you want to do the other side repeat the process. It is important to sand one side before covering the other side.


Monday, January 4, 2010

My New Roost

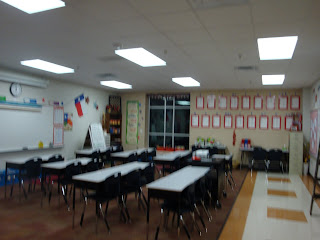
Well... it has been a long time coming, but the Annette Perry Falcons finally have a new roost. Tonight we had an open house for the families and the kids come tomorrow for our first day of class in our new school. I just wanted to share picts of my room. I really am proud of how cute it turned out. I couldn't have done it with out my cricut and Maya Road Chipboard. I just snapped a few quick picts as I was walking out the door tonight. Tomorrow I will take some better picts.
If I were taller, you could see the cool stuff I have up there. I'm not, so you need to come visit me.
I am so glad to have all my books out of storage. I have 18 of these great crates filled with picture books. This doesn't even count the tubs of chapter books that I have around the room. New teachers, I'm telling you....this is where you should invest. I've taught 1st through fourth grade and I have used these picture books in every single grade level. I love this paper- Websters Paper. Of course, everything looks great on a little Maya Road chipboard.

Here is the valance above my huge window. Lots of Jenny Bowlin and again more Maya Road, this time the stars and penants. (I don't think they make this one any more.)
This is the view from my door. I don't know if you can tell but I have this really kickin' document camera, computer and projector on the black cart in the middle. It is so cool. I am almost totally paperless except for my books. I invest in ebooks and materials that are pdf files. I love technology.

Tomorrow I will take some more close-ups so you can see some more of the goodies I made.

The goal was to make it tasteful and cute without being cluttered. I have a lot of students including my own son who don't need a lot of distractions.
Oh.....I don't know if I told you. From my window, I can see Dallas to Maypearl I bet. The water tower behind my mom's house is in the very center of my window when I sit down at my teacher table. I like looking there and thinking that that is where my mom and dad are. TFL!

Thursday, December 31, 2009

Just Wanted to Share

Before the holiday season was over, I wanted to share a little bit of what Luke did for school before the Christmas break. He had to make a concert t-shirt for his made up band. He had to tour Europe and visit several countries. He was in the Christmas Spirit, so he created a band called Polar Pudding and the name of his tour was called "The Proof is in the Pudding Tour." He is quite a whitty guy.
Front of t-shirt
Back of shirt
Map

I helped him with his extractions, but he did a really nice job I think.

Monday, December 28, 2009

Christmas


I am a terrible blogger lately, but I have had the most awesome Christmas ever. I'm hoping to have some time to scrap it later. I also never got around to printing and mailing out my Christmas cards so here they are. I may remake them and turn them into New Years cards LOL!

This was the serious card.

This is the funny one.
We are all about joy this year. We had it great measure! I hope your Christmas was joyous as well.