Monday, July 19, 2010

Alice Swap

My friend Dee Dee and I are participating in and Alice Swap. We have been wanting to do one for a while. When we hear that the Graphic 45 Alice paper was at The Crafty Scrapper, we ran over before our retreat and then got busy.
Dee Dee had a fabulous idea to share swap some tags. These are the big boy tags that have some serious room for embellishing. I don't know which tag is my favorite....but I am always partial to the Mad Hatter. Probably because my Little Luke was the most precious Mad Hatter and then Sam had a wonderful time with his hand me down costume.
I inked these tags repeatedly and stamped them. Then I had fun tearing up paper and inking it. When I made the Queen tag, I can't help but picturing a little Rachel Rike yelling out, "All Ways are My Ways!" or "Get to the Part Where I Loose My Temper!"
This paper is mega cute with the Halloween additions. The Hatter is holding candy corn. The Queen has horns and a tail. Alice has a wicked, cool hat.
Now the Cat....he is just creepy to me.
I like the Rabbit. He is a tad neurotic. But, I really like that he wants to be punctual.
I had such a great time making the tags. I really didn't want to give them up. I took the pictures so I can recreate them for myself if I ever have enough time.


Friday, July 16, 2010

Soar


This is an album I made for my principal that highlights her first year as a principal and our brand new school. It is filled with as many pictures as I could put in of her son and her during the different events last year. It is just wating on the school song. I couldn't remember all the words. So Sam is going to have to help me out! I want it to be perfect.

Thursday, July 15, 2010

Goth Senior Album for my Favorite Graduate

I wanted to make something a little different than the average album. I wanted it to be edgy but pretty. I wanted it to be just like my cat. I asked Cat what color she wanted and she said, "Purple." There was no hesitation. Purple with a little red and black I figured would make a really cool gothy look. So I was searching around The Crafty Scrapper and found this album from Fancy Pants. The album has felt, acrylic, cardboard, cloth and mirrored pages. Just the unique mixture of textures I wanted. Then I saw the great paper that had been put over with some Twighlight themed supplies. I grabbed the Maya Mist and my Maya Road goodies and I was ready to go.


Since my friend Dee Dee got me started on these glittered flowers, I can't stop making them.

I told Cat to put the pictures she wanted in a shutterfly accoung. She had millions. I knew that each one was a special memory of her senior year, so I wanted all of them in the book. There was a problem because most were taken on her phone. Solution. I printed off tons of tiny pictures.


Since I don't normally put too many picts on a page, this was a little challenge. But I wanted the pages filled with memories and eye candy.


The felt page was fun. I put a Maya Road cut out page over it and misted with Pearl mist. Came out really cool. I didn't want to cover it up with picts.


You just can't beat UTEE for a cool effect. I wrote on the crown, misted then coated with UTEE.


I didn't have one of her mega cute senior picts, so I'm hoping that Cat will insert one here. I love the Maya bling.

She has some cute little prom picts. There is a whole cool store about her prom and her one act play that I hope she will jot down with her sharpie marker.


This is the cloth page. It just soaked up that Maya mist like nobody's business.


Her graduation was so cool because the graduating class was so small. They had a slide show for each child and the grads gave roses to important people in their lives.
This is my favorite page. I knew it would be. I worked on it (really more like stared at it) for hours. I used the Maya wings as a mask and misted. The torn paper is a pocket for a cute little Maya Road envelope where she can put memories of graduation.
The last two pages are just covered with paper so she can take her sharpie and go to town.
I really like projects like this that push me out of my little box filled with boy stuff. I was really happy with how it turned out.

Friday, June 25, 2010

A Tea Party

Vanessa at Fanciful Twist is having a tea party and everyone is invited. Sam and I worked this week to make a little teacup garland to celebrate. Sam picket out his favorite Mad Hatter pictures. I had a little fun with some Maya Road Tea Cups that I bought at The Crafty Scrapper. I used paper from Bo Bunny and tons of stickles. Now we have a lasting momento of a fabulous time we had in the park.
Sam composed the story to go with the teacups.
Welcome to my tea party. I'm so glad that you weren't late. If you will follow me though the rabbit hole, we will be there in two shakes of a rabbit's tail This is my garden. It is filled with the most beautiful flowers. My friends and I love to come here on sunny summer mornings to start tea parties that last all day long.
Today we are having a little jasmine tea since I am going through a little Chinese phase.
Since we are having such a delightful time, I would like to entertain you with my version of, "Twinkle, Twinkle, little bat."Thank you for coming by. I hope that you will come back soon. But, I have to run. I don't want to be late for my next party!

Monday, June 21, 2010

Altering Away!

I have been away from the blog for quite a bit. It felt so good last week to be able to scrap away with my gals! When I go to a big crop like last week, I usually take a big project so I don't have to think about bringing a lot. When I was at The Crafty Scrapper, I saw these "Receipt Holders" from Seven Gypsies. It was different....so of course I wanted it, and I wanted to alter it.

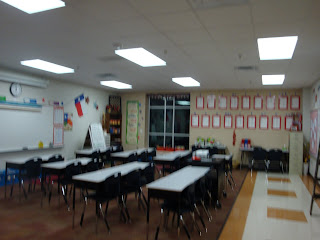
I stared at it for about two hours. I thought, I'll get the needle nose pliars out and take them apart so I could cover them totally. Well....that was a no go....there had to be a better way. So, I cut the piece that went down the middle 2 1/4 " wide and slid it under the springs. Then I cut the boarder pieces 3/4" and punched them. I made a few notches so it would fit securely around the springs. I think it will look great in my classroom. I put several items from my retreat so when I look at it, it will make me happy all school year long.

Last year my good friend Sherri gave me this flash card that she found with my name on it. I have been waiting to find something special to do with it. I couldn't decide if I wanted it in my classroom or my scraproom. Since I had some extra supplies from my above project, I decided to make it for my classroom. Lots of Graphic 45 and Maya Road goodness.

I had such a good time making the receipt board that I made one for The Crafty Scrapper too! It is filled with a lot more Maya Road products.

Thanks for looking. I'm so glad it is summer so I can craft, craft, craft!


Sunday, March 21, 2010

Playing with Dominoes

This is a copy of the challenge I am hosting on the K2K Kreative Krew Blog this week.

I'm Brook and I am your host for Challenge Number Four.
I know you have seen those cute domino pendants at the craft show and on ebay or etsy. They are so easy for the digital scrapper to make. I want to challenge you this week to try making your own.


There are several ways to do this. I'm going to share with you the easiest way possible.


You need: A domino, a bead, maybe adhesive, mod-podge or spray sealer, and jewelry or plastic glue.


1. Dominoes are 1 x 2". So make a mini layout that is .75 x 1.75". I just print them on normal paper so they lay flatter on my domino. Then cut out.


2. I just use any kind of scrapbooking adhesive on the mini picture and stick to the domino. (You can use the mod-podge to adhere the picture but let it dry before the next step.)


3. Then seal with the spray or mod-podge.


4. Next I place the clear bead on the top with jewelry or plastic glue. I like Beacon 375 but any will do.


If you've seen some other tutorials, they talk about letting the dominoes soak in bleach or using alcohol to take off the finish of the domino. I don't think it is necessary for this project. If you like doing this and want to stamp or use alcohol inks then you will need to remove the coating.


You can also make your domino a little dressier by using a silver bail that you find at the craft store. The dominoes can be horizontal or vertical.


I made 30 of these for a friends party and they were so easy to make. Here is one that I made for me. This took me less than 30 minutes to make.

I used Kris' "Circus in a Box" kit. If you win this challenge, your prize will be "Circus in a Box" so you can use this kit to make some fun pendants of your own. Anyone who participates will get a mini kit containing the eight items that I included on my pendant. If you use one of Kari or Kris' kits, you will get a little extra reward! ;)

Post the links to your pendants here. You have until Friday 26th at 12:00 pm CST. Have fun!

I hope that everyone will try this out and have a bit of fun!

Monday, January 18, 2010

Out of the Mouths of Babes


Okay. Here is last weeks POD. I decided that I was going to start taking pictures with my iphone because it is so easy and I usually have it out. I don't have to reach for a separate camera. I'm trying to make this as simple as possible.

Well, leave it up to Sam to find the errors in the week before. He told me that the pictures were on the wrong day and that there were other things that were more important. So here are the remade pictures.


So, so far it looks like I am keeping up with all of this. It doesn't seem like it should be hard, because I carry a camera in my purse all the time. I'm always snapping pictures of this and that.


Monday, January 11, 2010

Project 365


I'm going to try this again this year. I combined a little because I wanted to start this week as my week two. I like my weeks to start on Monday. I'm going to go back and put some numbers down on the second page and fix a few snaphooos, but I wanted to upload because I was going to try to be a better blogger.

Sunday, January 10, 2010

More Picts of the Room

I'm sure many of you are getting a little tired of hearing about my new classroom. I can't help it! I am so excited about my room. I still have tons to share. This is my outside bulletin board as you are walking down the hall. You can't help but see it.


A few little recycled beauties from my old school.
I did update the number on my door plaque.
I added this little bit of fluff over my door. I just didn't want anyone to not know which door was mine. This is a really cool thing. Built into our teacher cabinet, we have two places like this to put bulletin board supplies or charts. I am using them for bigbooks. I also have a few little Maya Road goodies that I have made into hall passes.
As you can see, I have covered tons of chipboard and wood. The other day at the Crafty Scrapper, some ladies were wanting to know the best way to cover chipboard. Well, everyone has their favorite, but I can do this in no time flat. This is how I do it.
You have to have a glass mat and here is the key- the fiscars finger cutter. I only like the orange one. The new retractable one does not give me the pressure I need at all. You can cover the chipboard with modpodge or outline them with your favorite adhesive. Place your piece or pieces of paper on the chip board. Then turn the letter over so the paper is on the glass mat. Take your fiscars and trace around the letter. Easy peasy lemon squeezy. No problem at all. I then take my Basic Grey files and file them. Then I ink. I have been using Ranger Vintage Photo, but this last group was done with Brown Courderoy. I really liked the effect. If you want to do the other side repeat the process. It is important to sand one side before covering the other side.


Monday, January 4, 2010

My New Roost

Well... it has been a long time coming, but the Annette Perry Falcons finally have a new roost. Tonight we had an open house for the families and the kids come tomorrow for our first day of class in our new school. I just wanted to share picts of my room. I really am proud of how cute it turned out. I couldn't have done it with out my cricut and Maya Road Chipboard. I just snapped a few quick picts as I was walking out the door tonight. Tomorrow I will take some better picts.
If I were taller, you could see the cool stuff I have up there. I'm not, so you need to come visit me.
I am so glad to have all my books out of storage. I have 18 of these great crates filled with picture books. This doesn't even count the tubs of chapter books that I have around the room. New teachers, I'm telling you....this is where you should invest. I've taught 1st through fourth grade and I have used these picture books in every single grade level. I love this paper- Websters Paper. Of course, everything looks great on a little Maya Road chipboard.

Here is the valance above my huge window. Lots of Jenny Bowlin and again more Maya Road, this time the stars and penants. (I don't think they make this one any more.)
This is the view from my door. I don't know if you can tell but I have this really kickin' document camera, computer and projector on the black cart in the middle. It is so cool. I am almost totally paperless except for my books. I invest in ebooks and materials that are pdf files. I love technology.

Tomorrow I will take some more close-ups so you can see some more of the goodies I made.

The goal was to make it tasteful and cute without being cluttered. I have a lot of students including my own son who don't need a lot of distractions.
Oh.....I don't know if I told you. From my window, I can see Dallas to Maypearl I bet. The water tower behind my mom's house is in the very center of my window when I sit down at my teacher table. I like looking there and thinking that that is where my mom and dad are. TFL!